Do you ever need to download the production DB to your localhost for development purposes? Or just sync changes from one DB to another?
This can be done using Mingo’s Compare & Sync tool. You don’t need to write scripts or use the terminal mongodump / mongorestore functions, anymore.

With Mingo’s Compare & Sync tool you can:
- compare collections in two different databases (source and destination, databases may be on the same or on different servers)
- select the collections to compare
- analyze each document and tell if it has been added, removed or updated in source collections
- synchronize the changes into destination collections
The comparison happens in 3 steps:
- Get meta information (list of collections and number of documents in each)
- Comparison of actual documents in both, source and destination collections
- Synchronizing document changes into destination collections (if requested)
Under the hood
Document comparison happens on the corresponding servers directly. The comparison creates a hash for each document and sends them back to Mingo. Mingo compares the hashes and tells you how many docs have been added, removed and updated.
Synchronizing
Once the comparison has been finished, Mingo lets you choose the collections you want to synchronize. Before syncing, you are prompted to choose which documents to sync (added, updated, removed).
Saving comparison setup for future use
Once the source db, destination db and the collections to compare have been selected, you can save this comparison setup and reuse it in the future for faster synchronizing.
* The actual hashing may put high CPU load on the servers in case of large collections, so Mingo skips collections with more than 100k documents.
* Running Compare & Sync requires a local mongo instance.
We are all tired of new shortcuts we have to learn. Mingo’s shortcuts mimic what you are already used to from a browser or your dev tool.
However, Mingo also has some new intuitive “hovering” shortcuts. Just hover over a document and press space or X to select the document. Or hover a document and CMD+C / CTRL+C to copy document value.
To make using Mingo even faster and more intuitive, it features a lot of keyboard shortcuts. We didn't want you to learn a new set of shortcuts, so we tried to use the same ones you are used to.
Global
| ⌘R | reload the content of the current tab's view (for example reload documents) |
| ⌘F | find in page (fulltext) |
| ⌘N | open a new Mingo window |
Tabs
| ⌘T | open new tab |
| ⌘W | close current tab |
| ⌘⇧T | reopen recently closed tab |
| ⌘1 - ⌘8 | focus n-th tab |
| ⌘9 | focus last tab |
| ⌘LEFT | focus tab to the left |
| ⌘RIGHT | focus tab to the right |
| ⌘⇧LEFT | move current tab to the left |
| ⌘⇧RIGHT | move current tab to the right |
| CTRL+TAB | focus previous tab |
Documents
| ⌘R | reload documents |
| ⌘A | select all documents |
| ⌘Enter | in query input to submit |
| Type { | focus query input (selector) |
| ⌘Z | open UNDO modal |
| Point cursor at document and press X (only letter x) or space | select that document |
| Point cursor at document header and press ⌘C | copy the entire document |
| Point cursor at document and press E | edit the document |
| Point cursor at field and press ⌘C | copy the value |
| Point cursor at field and press E or Double-Click | edit the field inline |
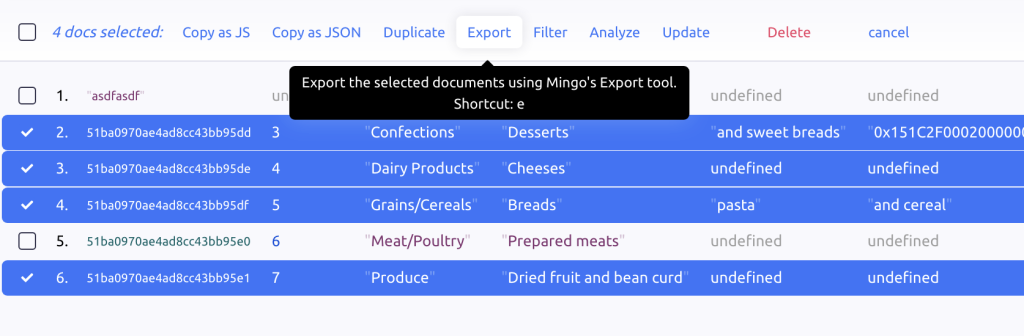
Working with multiple selected documents
Once you select multiple documents, options appear at the top. Each of these options has a keyboard shortcut, a letter. Just press the letter and run the action:
The majority of queries we execute on MongoDB collections are very simple. We usually search for an _id, an email or username and we do this many times over every day. To make such searches simple and fast, Mingo provides a few great hacks for you.
Value as query
First of all, indexed fields can be searched swiftly by using the value as query. For example: let's say you have a collection where the fields "slug" and "city" are indexed. If you enter a string expensive in the query, Mingo will search for the value in all indexed fields and show you the resulting query that found results. In this case it would be {slug: "expensive"}.
Since most of the often queried fields are indexed (or at least, should be...), such searches will be fast and efficient.

The above will automatically turn into this:

You may go even further, and instead of specific value, you may enter a regular expression to search for.
For example: /sales/i will search for documents where the indexed fields match "sales" in case in-sensitive mode.

Paste & Go
Paste & Go is a great feature, especially combined with the Smart search mentioned above. Pressing CMD+G / CTRL+G will paste the current clipboard contents into the query field and submit it. The pasted value could be a regular query or just a phrase or _id copied from your admin or other app.
If the value is not an object (real query), Mingo will treat it as a value, execute the Smart search and show the resulting documents.
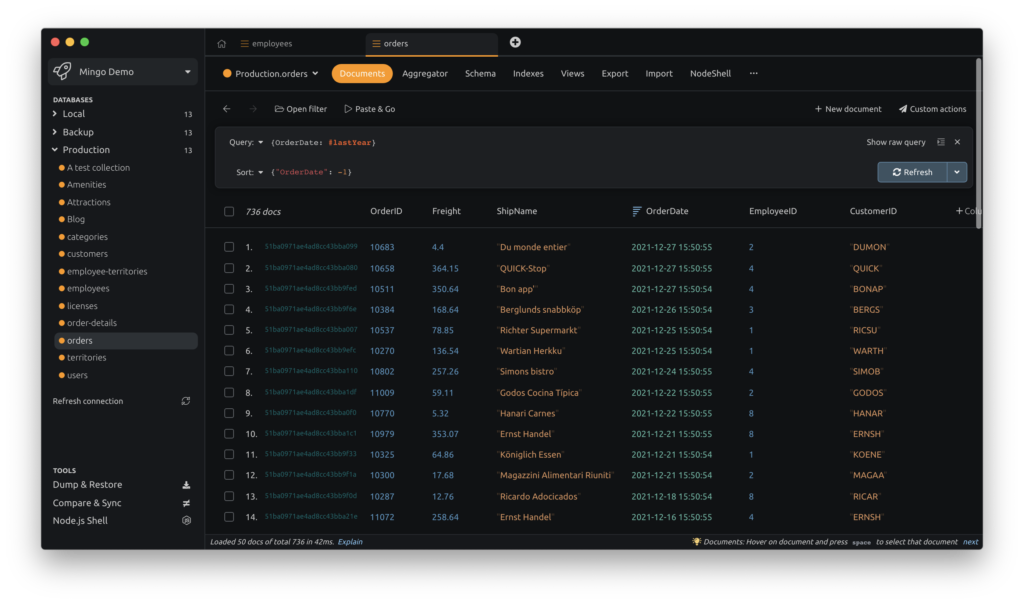
Dates by tags
Imagine being able to do this: { "createdAt": #lastWeek }. Before Mingo, this was not possible! Check out this article on all the options and how to use it. It is really handy.
When documents reference each other, they usually do so by the _id of the referenced document. There are several types of document relations (such as one-to-many, one-to-one, many-to-one, many-to-many), but we can generally say that there is always a parent document (the one referencing) and a child document (the one being referenced).
For example, you could have the following document in Orders referencing a document in Users collection:
{
  _id: new ObjectId("8cc43bb95dd51baa970ae4ad"),
  user: new ObjectId("51baa970ae4ad8cc43bb95dd")
}
{
_id: new ObjectId("51baa970ae4ad8cc43bb95dd"),
firstname: 'John',
lastname: 'Smith'
}When you are viewing the Orders collection, the ObjectId("51baa970ae4ad8cc43bb95dd") does not say much to you. It would be much more preferable to see that it is actually John Smith.
Mingo's aproach to the problem
To make your data more readable, Mingo analyzes possible data relations within a database and shows more human information about the referenced documents and the relation itself.

Mingo searches through samples of documents from each collection and identifies fields that look like an _id. Then it tries to find those _id's in the database. When found, it creates a relation and guesses the best field to show as a preview. In the example above, the document references the Schools collection document and the "name" field was chosen to be the preview value.
The same relation is then shown in the referenced document:
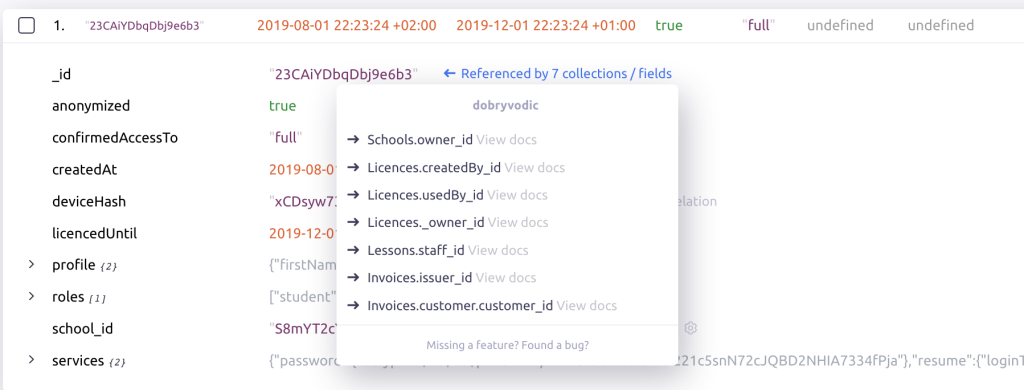
Relations are automatically analyzed upon first connect to the database.
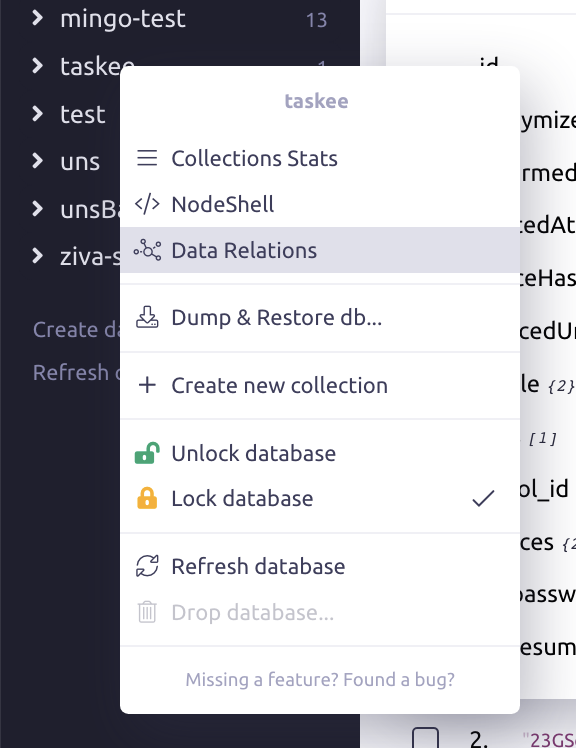
Managing data relations
Usually, there is very little you have to do for relations to work properly in Mingo. To view the currently known relations, right-click the database in the sidebar and select Data Relations:
The list of Data Relations will be shown:
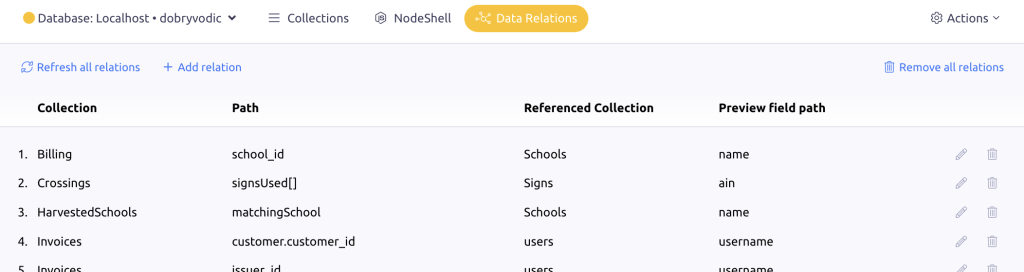
In the above screenshot, the first relation means the following: Documents from the Billing collection reference by the field "school_id" documents in the Schools collection. The "name" field in the Schools collection was chosen to show a more human value.
Add a new relation
Mingo let's you add a new relation in the list of relations (mentioned above) or gives you the opportunity to do so when it guesses a field is an _id, but there is no relation set so far:

Edit an existing relation
To edit a relation from the list of data relations, just click the pencil icon. You can also edit the relation where the preview is shown in the documents. Just click the cog icon.
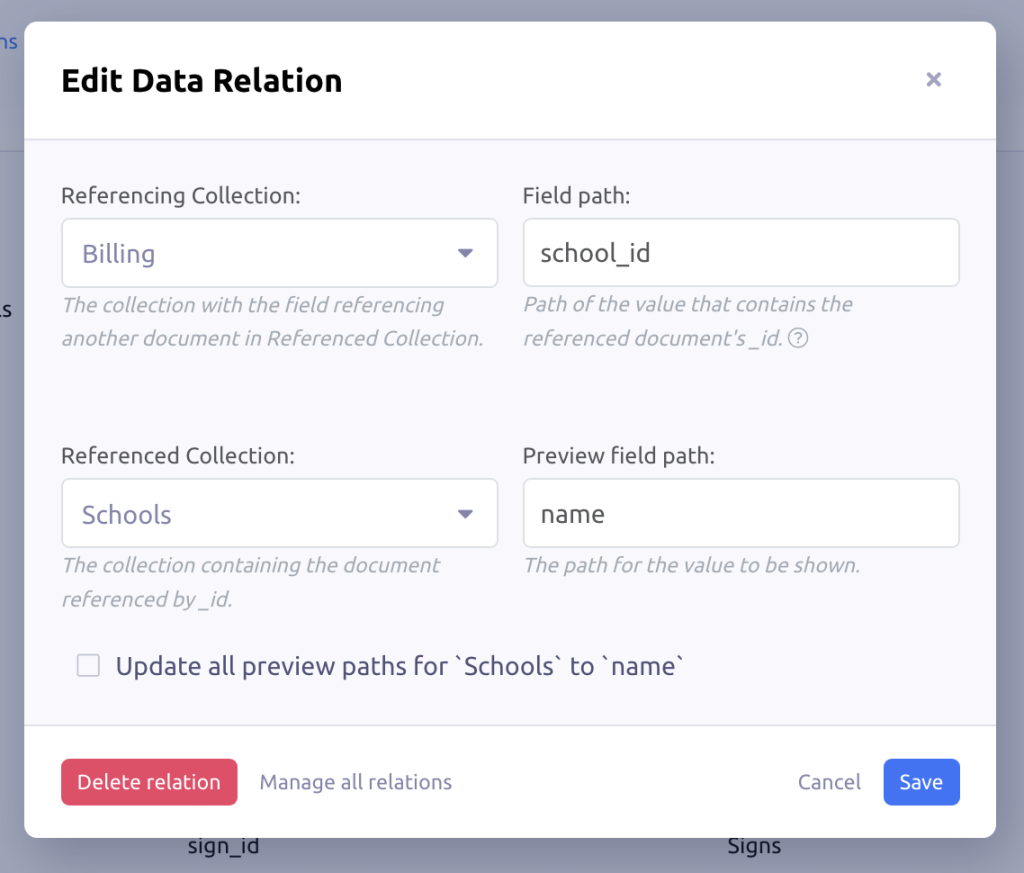
Follow the instructions in the modal to update or remove the relation.
The last checkbox is worth mentioning: "Update all preview paths for 'Schools' to 'name'". This allows you to update the preview field for collection in all existing relations at once. It is very handy when you have several relations poiting to the same collection.
Delete an existing relation
To delete a relation from the list of data relations, just click the trash icon. You can also delete the relation where the preview is shown in the documents. Just click the cog icon and press the delete button in the bottom left corner of the modal.
Other considerations
Extra information is requested from the database to show the related document's preview field. Mingo is optimised to do this efficiently, but if you have many relations, it could have performance implications. If this negatively affects your user experience or puts a burden on your server, minimize the number of relations to those you really need. You can also delete them all completely.
Mingo's algorithm analyzing the relations is not perfect if your data is not consistent or you use very specific values for your _ids. In such case, we recommend setting your relations manually.
The preview fields are selected automatically by Mingo using simple criteria. In case an inappropriate field is selected, you can edit the relation and update the preview field manually.
What is a MongoDB GUI client?
MongoDB GUI is a graphical interface for MongoDB. It provides a way to view and manipulate data in MongoDB databases using the MongoDB API or MongoDB Shell. As you may know, you can query your data through the command line, but this gets messy and you can get easily lost.
How to select the best MongoDB GUI?
This really depends on who you are and what work you do on MongoDB databases. Some of us just love the terminal and its commands. Others prefer nice smooth user interfaces with click-to-get-done features. There's also a difference between MongoDB admins / GUIs and almost CMS-style apps allowing non-devs to list, filter, and update data based on predefined rules.
1. Mingo
Surprise, we made it to our list 🙂
Mingo is actually somewhere in the middle. It is not a CMS for your sales colleague, but its interface still makes you fall in love with your data and execute complex tasks with a few clicks. Have a quick glance at Mingo:
Just a couple of spontanious reactions of Mingo users (they sent it through Mingo's Github Issues page):
- "Tried this one, not hoping for much. Boy, was I wrong! Fast, tons of very usefull features… nice to look at too… linux version…"
- "The team is loving it and we replaced 3T with Mingo :D"
- "Mingo.io it's a fantastic Mongo client and my colleagues and I are already loving it!"
- "@mingo_io is an amazing tool, light years ahead of default Compass Tool by @MongoDB"
- "This is by FAR the best software for managing MongoDB I’ve found and used. Guys, BY FAR. And is just the beginning! Will be buying the lifetime access"
- "Happy to help! I want to see this product succeed. I already love it and prefer it much more than NoSQLBooster!"
- "We have tried your trial version and we found your tool to be the best tool to be used for MongoDB. We have bought 25 licenses today."
- "Hi Mingo team, I am looking for an alternative to Robo 3t and I found you and I have to say you look very interesting, so first of all congratulations."
- "Hello Mingo team! Thank you so much for making this tool! I've been using a premium version for a few days now and all I can say is - hands down, the best MongoDB client ever. Period.️"
Mingo is a cross-platform IDE with awesome features and a superb interface that provides you with a great user experience. It is a great tool for anyone who wants to have a nice and intuitive GUI for managing MongoDB data.
Mingo offers three subscription packages and also a Free plan. Paid plans are Plus for 2€/user/month, Standard for 4€/user/month, and Pro 19€/user/month. Download Mingo and speed up your workflow now.
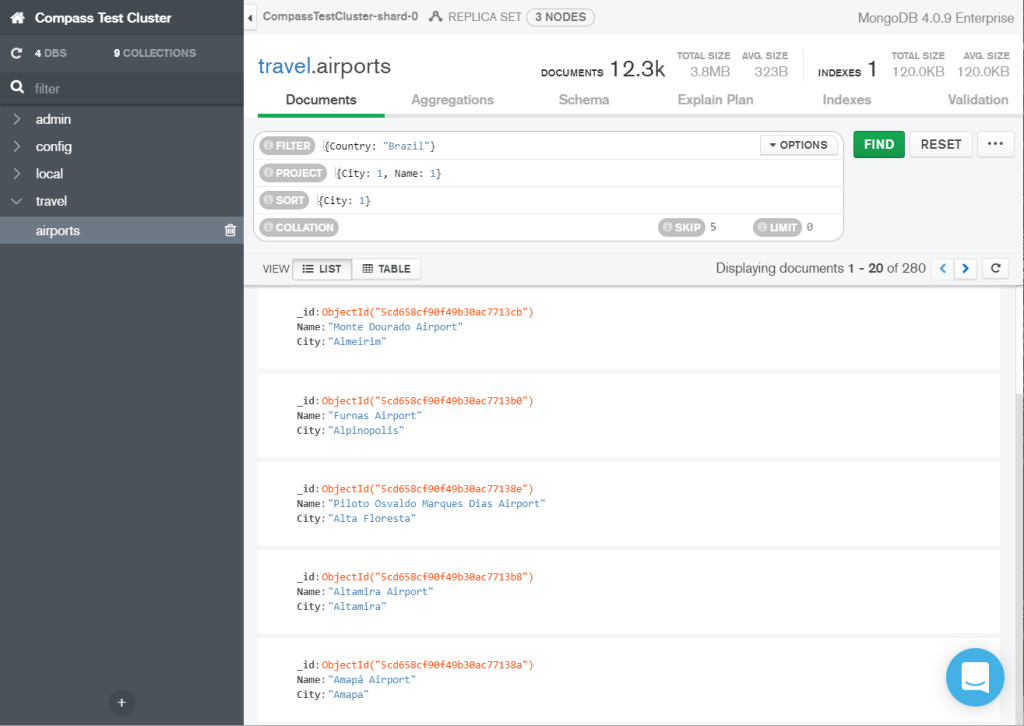
2. MongoDB Compass
MongoDB Compass is built by MongoDB, Inc. directly. It is a great tool for beginners who are only getting familiar with MongoDB since Compass is Free to use. Compass interface is not so intuitive and also lacks some advanced features.
The best features of Compass are Schema Analyzer, Validation Rules for your Schema, and MongoDB Shell.
3. Studio 3T
Studio 3T is also a cross-platform IDE with a lot of features. It is a great tool for advanced users. The best features of Studio 3T are Data import from SQL and Oracle, SQL to MongoDB query, and drag-n-drop query builder.

It offers three subscription plans with no free plan ranging from $199/user/year up to $699.00/user/year.
4. NoSQLBooster
Another great tool growing in popularity in the last 2 years. NoSQLBooster is a cross-platform GUI tool for MongoDB v2.6-5.0, which provides a build-in MongoDB script debuggerMongoDB script debugger, and comprehensive server monitoring tools, chaining fluent query, SQL query, query code generator, task scheduling, ES2020 support, and advanced IntelliSense experience.
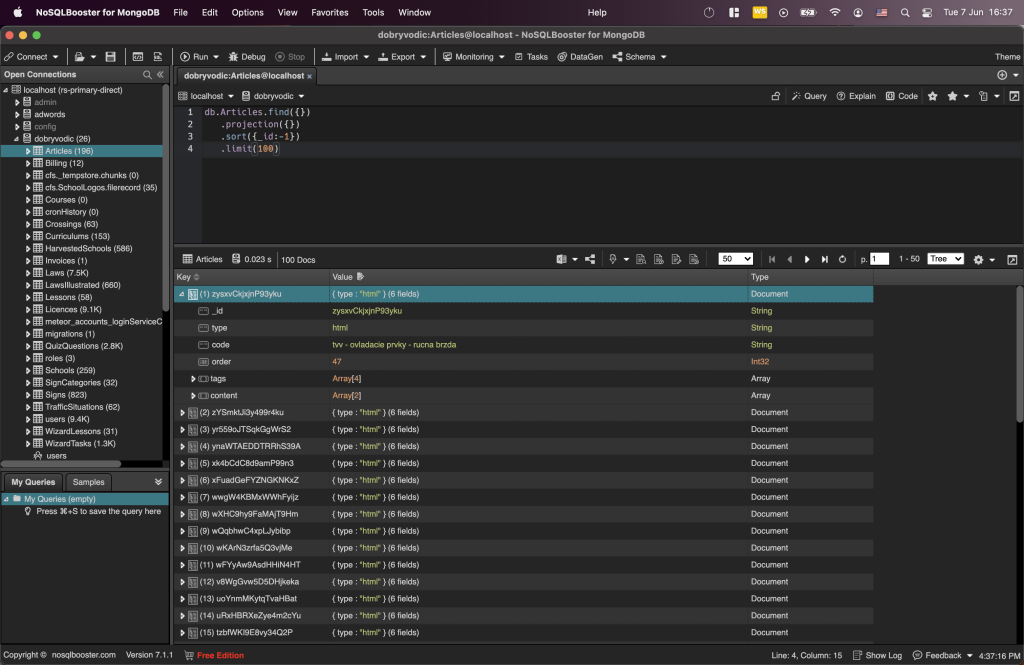
NoSQLBooster offers several subscription plans starting at $129/year.
5. HumongouS.io
HumongouS.io claims to be the first GUI / Admin that regular users will love, too. They have a nice clean user interface, which is also mobile-friendly. If you need to share data and simple editing options with your colleagues, this is your choice. However, if you need a more dev-oriented focus and core functionality, HumongouS.io is just too simple for you. It's more like a nice browser, not an advanced MongoDB admin.

HumongouS.io offers three plans Team $19/user/month, Business $49/user/month, and Enterprise.
MongoDB's aggregation is one of the most powerful tools in the database, allowing you to perform complex data analysis on large datasets. This article will show you how to use aggregation to create powerful data aggregations.
Basic aggregations
An aggregation is a powerful tool for data analysis. It allows you to perform complex queries on datasets. To use the aggregations, you must first have a MongoDB collection. In this example, we'll use a collection of blog posts.
$match stage
Once you have a collection, you can begin creating aggregations. The simplest aggregation is a match, which filters the documents in the collection to those that match the specified criteria.
For example, the following match aggregation will return all documents in the collection where the author is "John Doe":
db.posts.aggregate( [ { $match: { author: "John Doe" } } ] ) If you want to return only the documents where the author is "John Doe" and the title contains the word "MongoDB", you can use the following aggregation:
db.posts.aggregate( [ { $match: { author: "John Doe", title: /MongoDB/i } } ] )The match aggregation is very powerful, but it can only be used to filter documents. If you want to perform complex data analysis, you will need to use other aggregations.
$group stage
The next aggregation is the group. The $group aggregation allows you to group documents by a specific field. For example, the following aggregation will group all documents by the author field:
db.posts.aggregate( [ { $group: { _id: "$author", count: { $sum: 1 } } } ] )The group aggregation returns a document for each author in the collection. The document contains the author's name and the number of documents written by the author.
Combine multiple stages into a pipelines
If you want to know how many posts each author has written about MongoDB, you can use the following aggregation:
db.posts.aggregate( [
  { $match: { title: /MongoDB/i } },
  { $group: { _id: "$author", count: { $sum: 1 } } }
] )
The match aggregation will filter the documents to only those that contain the word "MongoDB" in the title. The group aggregation will then group the documents by author and return the number of posts each author has written about MongoDB.
The group aggregation is very powerful, but it can only be used to group documents. If you want to perform complex data analysis, you will need to use other aggregations.
$project stage
The final aggregation is the project. The project aggregation allows you to transform the documents in the collection. For example, the following aggregation will return the title and author of each document in the collection:
db.posts.aggregate( [ { $project: { title: 1, author: 1 } } ] )Aggregation pipeline
MongoDB supports a wide variety of aggregation stages, including those for arithmetic, comparison, and logical operations. See the list of MongoDB aggregation pipeline stages.
In addition to match, the aggregation framework provides a number of other operators, including:
- $project: This operator allows you to select, rename, and reshape fields in the documents in the collection.
- $group: This operator groups documents together by a specified key.
- $sort: This operator sorts the documents in the collection by a specified key.
- $limit: This operator limits the number of documents that are returned from the aggregation.
- $skip: This operator skips a specified number of documents.
To learn more about the aggregation framework, check out the MongoDB documentation.
Aggregations made easy with Mingo
Mingo is a great tool for those who are just getting started with MongoDB, and it is also great for those who want a more user-friendly interface for their database. You can easily create MongoDB aggregations with our GUI.

You can learn more about our MongoDB Aggregator Tool or you can download it right away and give it a try.